一番シンプルなShinyアプリケーションのコードです。
実行すると空白のページが表示されます。
ui.R
shinyUI(fluidPage(
))
デフォルトでは、サイドバーパネルはアプリケーションの左側に表示されます。オプション position = “right” をつけることで右側に配置することもできます。
server.R
shinyServer(function(input, output) {
})
レイアウト
fluidPage()関数は、ブラウザの画面サイズに合わせて自動的にレイアウトが調整可能な画面を生成します。fluidPage()関数にパラメタを渡すことで、アプリケーション内に指定した要素を配置することができます。
# ui.R

shinyUI(fluidPage(
  titlePanel("タイトルパネル"),

  sidebarLayout(
    sidebarPanel( "サイドバーパネル"),
    mainPanel("メインパネル")
  )
))
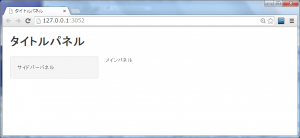
実行すると以下のような画面が表示されます。
fluidレイアウトなのでブラウザの画面サイズを変更すると自動的にレイアウトが調整されます。
よく使われる要素として、titlePanelとsidebarLayoutがあります。
- sidebarPanel 出力する文字列
- mainPanel 出力文字列
デフォルトでは、サイドバーパネルはアプリケーションの左側に表示されますが、
オプション position = “right” をつけることで右側に配置することもできます。
library(shiny)

shinyUI(fluidPage(
  titlePanel("タイトルパネル"),

  sidebarLayout(position = "right",
    sidebarPanel( "サイドバーパネル"),
    mainPanel("メインパネル")

  )
))
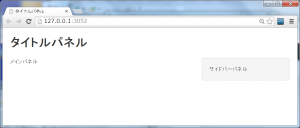
実行すると以下のようにサイドバーが右側に表示されます。
titlePanelとsidebarLayoutだけで、基本的なレイアウトはできますが、もっと凝ったレイアウトにすることもできます。例えば、navbarPageをつかってナビゲーションバーをつくることもできます。
このあたりは、Bootstrapの恩恵ですね。
まだ試していませんがBootstrapのテーマも利用できるようです。
詳しく勉強したい方は”Shiny Application Layout Guide”を参照してください。
HTMLコンテンツ
パネル上にコンテンツを追加することができます。
***Panel関数の中に記述することによって、パネル上に文字列を表示することができます。
HTMLタグを直接書く場合はHTML関数を使用します。
| shiny関数名 | 対応するHTML5タグ | creates |
|---|---|---|
p |
<p> |
A paragraph of text |
h1 |
<h1> |
A first level header |
h2 |
<h2> |
A second level header |
h3 |
<h3> |
A third level header |
h4 |
<h4> |
A fourth level header |
h5 |
<h5> |
A fifth level header |
h6 |
<h6> |
A sixth level header |
a |
<a> |
A hyper link |
br |
<br> |
A line break (e.g. a blank line) |
div |
<div> |
A division of text with a uniform style |
span |
<span> |
An in-line division of text with a uniform style |
pre |
<pre> |
Text ‘as is’ in a fixed width font |
code |
<code> |
A formatted block of code |
img |
<img> |
An image |
strong |
<strong> |
Bold text |
em |
<em> |
Italicized text |
HTML |
Directly passes a character string as HTML code |
サンプルソースです。
library(shiny)

shinyUI(fluidPage(
  titlePanel("My Shiny App"),
  sidebarLayout(
    sidebarPanel(),
    mainPanel(
      h1("First level title"),
      h2("Second level title"),
      h3("Third level title"),
      h4("Fourth level title"),
      h5("Fifth level title"),
      h6("Sixth level title")
    )
  )
))
ヘッダー
見出しを出力するには、これだけの手順でOKです。
- 関数を選択する(例:h1、h5など)
- 関数に表示したい文字列を渡す
# ui.R

shinyUI(fluidPage(
  titlePanel("My Shiny App"),
  sidebarLayout(
    sidebarPanel(),
    mainPanel(
      h1("First level title"),
      h2("Second level title"),
      h3("Third level title"),
      h4("Fourth level title"),
      h5("Fifth level title"),
      h6("Sixth level title")
    )
  )
))

